Pages

Selasa, 17 April 2012

Simpan halaman web untuk dibaca offline [Google Chrome]

Ketika kita menemukan artikel di internet baik tutorial, artikel, panduan atau tulisan menarik lainnya, kadang kita ingin agar artikel tersebut bisa disimpan di komputer dan dibaca secara offline tanpa koneksi internet. Tetapi dengan menyimpan biasa, terkadang halaman tidak akan tampil sempurna, lalu bagaimana solusinya ?
Bagi pengguna Google Chrome, ada Extensions atau semacam plugins yang bisa kita tambahkan (install) untuk menyimpan halaman web secara utuh dan bisa dibaca offline (tanpa koneksi internet). Bagi pengguna web browser lain semisal Firefox, saya juga pernah mengulas untuk menyimpan halaman website menggunakan plugins Mozilla Archive Format /MAFF atau teknik lainnya (bisa dibaca Menyimpan Satu Halaman penuh Website (Firefox, Chrome, Safari) atau Tips menyimpan sebuah halaman web secara utuh).
Sebenarnya ada beberapa extension Chrome yang bisa kita gunakan, sebelumnya saya pernah menggunakan Chromium Scrapbook, dan sampai saat ini masih berjalan normal dan bisa digunakan. Sayangnya Scrapbook ini sudah dihentikan pengembangannya, meskipun masih bisa digunakan. Alternatif lain yang tidak kalah bagus adalah PageArchiver.

PageArchiver merupakah extensions Google Chrome yang mempunyai fitur mirip dengan Scrapbook, tetapi lebih lengkap. Fitur-fiturnya antara lain :
  • Menyimpan halaman web (arsip) secara utuh agar bisa dibaca offline
  • Export atau import file dalam bentuk HTML, sehingga bisa dibaca (pindah) secara terpisah di luar PageArchiver
  • Mengedit halaman web yang sudah disimpan dengan fitur dari PageArchiver
  • Menambahkan tags dan rating untuk arsip yang sudah disimpan
  • Filter dengan kata tertentu untuk mencari arsip yang sudah disimpan
  • Mengurutkan arsip atau halaman yang sudah disimpan berdasar tanggal, judul, url, tag dan lainnya
  • Bisa melakukan pencarian melalui omnibox dengan mengetikkan ‘pa’ di alamat URL chrome
  • Bookmark dan menyimpan arsip dengan Ctrl+S
Melihat fitur-fiturnya sepertinya lebih lengkap dari Scrapbook, dan setelah dicoba memang saya lihat lebih unggul, terutama dari fitur-fitur dan kemudahan penggunaan, sehingga sepertinya mulai beralih menggunakan extensions ini.

Penggunaan PageArchiver

Untuk menggunakan extension ini, download PageArchiver dan install di google chrome. Sebagai catatan, extension ini memerlukan “SingleFile Core” yang juga harus di install, bisa langsung install dari halaman SingleFile Core.
Setelah di install, di toolbar Google Chrome akan tampil icon seperti “open Folder” yang menunjukkan bahwa PageArchiver sudah aktif dan bisa kita gunakan. Untuk menyimpan halaman website, buka dulu halaman website yang ingin kita simpan, lalu klik icon PageArchiver dan pilih menu “tabs”. Selanjutnya kita bisa memilih tab atau artikel mana yang akan disimpan ( pilih dengan memberi tanda check dan klik tombol “save” dan tunggu proses penyimpanan selesai)

Setelah halaman website tersimpan kita bisa melihat melalui PageArchiver melalui menu atau link Archives. Tersedia beberapa menu, seperti Open (untuk membuka halaman web), Delete, Tags dan Export (untuk menyimpan arsip menjadi sebuah file html yang bisa dibuka secara terpisah).
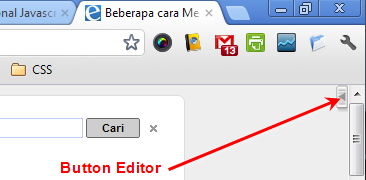
Untuk mengedit halaman website, PageArchiver juga memberikan fitur menarik. Buka halaman website dengan PAgeArchiver kemudian klik tombol yang ada di pojok kanan atau untuk menampilkan menu editor. Selanjutnya setelah kita edit halaman web ini bisa kita simpan.


Jika halaman yang kita simpan sudah banyak, kita juga bisa mencari melalui alamat URL di google chrome. Ketikkan saja kata ‘pa’ (tanpa tanda petik) dan ikuti dengan spasi, maka otomatis akan tampil “Page Archiver” dan kita bisa mencari artikel yang sudah tersimpan.

#sumber..,, http://ebsoft.web.id/simpan-halaman-web-untuk-dibaca-offline-google-chrome/

Identifying the injection

Tutorial

In this tutorial, you will learn how to use The Mole to exploit SQL Injections, extracting
data from the database and reading files from the vulnerable server.
In order to read a complete reference of The Mole's commands and how to use them, please
visit http://www.aldeid.com/wiki/TheMole (btw, thanks to Sébastien Damaye for writing
such a complete guide!).
If you happen to encounter some problem when exploiting an SQL Injection, caused by
some filter or IPS used by the target server, please visit our filters tutorial.
Before we start, you must know what is required in order to exploit a SQL Injection using
The Mole. Once you have found a vulnerable script, you have to find a string which normally
appears in the web page, but does not appear when you negate the query which is
being executed on the database(by modifying the vulnerable parameter).

Identifying the injection

This example will be shown using this test site:
Okay, assuming we don't know there's a SQL Injection, we will ensure there is one on
the parameter "id". We negate the query which will be executed in the database, and try
to find the string above mentioned.
Fine, we see the string "admin" has disappeared. We will provide this string to The Mole and
exploit the injection.

Exploiting the injection

First of all, we execute The Mole using the parameter "-u" to indicate which URL
 we will be using, and "-n" to indicate the needle/string. Our command should look like this:
./mole.py -u 'http://192.168.0.142/vulnerable/sqli.php?id=1' -n 'admin'
The mole will start and give us a prompt:
Notice that by default, the last parameter on the URL is used as the vulnerable 
parameter. If you want to specify another parameter as the vulnerable one, you can 
use the "-p" command line argument, or use the "injectable_field" command.

Windows users

Windows users shoud be aware that when using the "-u" command line argument, the "&"
characters have to be escaped manually using the "^" character. Therefore, if the URL has
two parameters, it should look like this:
mole.exe -u http://192.168.0.142/vulnerable/sqli.php?param=1^&id=1 -n 'admin'
You can also set the URL by using the "url" command, so you can paste the URL without
quoting it. The needle can also be set using the "needle" command.

Okay, we are ready to go. First of all, we want to know which databases are available
on the system. The command "schemas" will dump their names.

The Mole has done two things here:
  • Find exploitation parameters, such as number of columns, the comment to be 
  • used, the back-end database, the number of parenthesis, etc.
  • Once it has been initialized, it dumps the database names, using back-end database 
  • specific queries.
Note that the initialization phase is done only once. Moving on, we will dump the tables
in the "test" database. The "tables" command does that, and requires the database name as
 its argument:

Great! There's a "users" table! Now we need to find the columns of that table. The "columns"
command requires the name of the database and table name as its arguments.

We see 3 columns, id, username and password. Now it's time to dump those hashes :D. The "query" command requires the database name, the table name, and a list of comma-separated columns to dump. Alternatively, you could use '*' in the columns field, but we don't want to dump the "id" column right now, so we will do it manually. Remember that The Mole provides nice autocompletion features, so the database, table and column names will be autocompleted whenever you press the TAB key.

Nice! We've got the administrator's credentials. However, when we dumped the database names, we could see "mysql", so we probably have mysql root privileges. Let's find out by using the "dbinfo" command, which will dump the database user, name and version.

Ha, thought so, we have root privileges. Okay, lets try reading a file by using the "readfile" command, which expects the filename to be read as its argument. We will read /etc/passwd as an example.

Okay, now we move on to the handy commands which will make things faster. Imagine we don't know which tables exist on the "mysql" table. In this case, the injection goes quite fast, since it can be exploited through the union technique, however, Blind SQL Injections are pretty common. In the latter case, dumping the name of every table in a certain database can be quite slow. In this case, we will use the "find_users_table" command, which tries to find a table name in a certain database which "looks like" it might contain usernames and passwords(based on its name). Note that this command does not use any metadata database/table, such as information_schema.tables, so it can be used in scenarios where the back-end database is a Mysql < 5, which does not contain the information_schema databse.
This command contains a small list of names, you can artenatively use "find_tables" which tries to find tables using a list provided by you.

As expected, mysql.user exists :D. Now we will use another command which will be more useful, but requires information_schema(or any other DBMS database which serves the same purpose) to exist. The "find_tables_like" command requires a database as its first argument and a string which will be used to search for database names. You can use the '%' wildcard, or any other database specific. As an example, we will find all tables that contain the substring "ABLE".

Going back to the "query" command, we can use some extra parameters which will be useful under certain situations. We can limit the number of rows to be dumped and/or indicate the first index from which to start the dump(0-index based). This prints only one row, starting from the second index.
We can also indicate a "where condition", in order to only dump rows which match it.

To sum up, here's a video of The Mole exploiting a SQL Injection, using both union and blind techniques.

That is all right now. This tutorial will be extended soon. Hope you find it useful!

#sumber : http://themole.sourceforge.net/?q=tutorial

Filters tutorial

This tutorial will explain the filters available on The Mole. Filters can be used when there is some kind of IDS/IPS on the target server which is preventing us from successfully exploiting an injection. When this situation happens, you may want to apply one or more filters in order to try to bypass the filtering performed by the server.
Filters are separated into 3 categories:
Query filters
These are applied to the SQL query being performed. There are several Query Filters:
  • between
  • This filter can be used when the target server applies some kind of XSS filtering, which as a consequence removes the greater(>) and lower(<) characters. When this happens, blind exploitation will most certainly fail, since this technique uses queries that contain these characters to guess the information available on the database. This filter converts expressions like '.... and 1 < (select length(user()))' to '.... and 1 between 0 and (select length(user())) - 1'. To enable this filter, execute:
    qfilter add between
  • case
  • This filter randomizes the query's case. The case filter can be used to bypass some simple IPS which detects strings like "select" or "union" and exits the script whenever it finds one. By using this filter, queries like "... union all select 1,2,username,4 from blah.users" will be converted to "... UNioN alL seLEcT 1,2,uSErNaME,4 FrOM blah.users", which will bypass that simple filter. To enable this filter, execute:
    qfilter add case
  • mssqlcollation
  • This filter is not intended to bypass an IPS. On SQL Server, sometimes when you try to perform an union and the involved tables contain different collations, the resulting query will fail due to a mix of collations. This filter enables the user to perform these kinds of queries successfully. When you use this filter, queries like ".... select cast(blah as varchar(100)) from foo" will be converted to ".... select (cast(blah as varchar(100)) COLLATE __COLLATION__) from foo", where __COLLATION__ is the selected collation. By default, __COLLATION__ is DATABASE_DEFAULT, but you can change it when adding the filter, or after is has been added using the "config" parameter. To enable this filter, execute:
    qfilter add mssqlcollation
    To set the collation when adding the filter, execute:
    qfilter add mssqlcollation THE_COLLATION
    If you want to change the collation after the filter has been added, use the config parameter:
    qfilter config mssqlcollation collation THE_COLLATION
    Sometimes, while you need to use the COLLATE clause, some fields involved in an union statement must not contain the COLLATE clause, otherwise the query fails. In this cases, you can add those special fields to the mssqlcollation filter blacklist. Fields included in this blacklist will be skipped when adding the COLLATE clause to the query.
    In order to add fields to the blacklist, execute(after the filter has been enabled):
    qfilter config mssqlcollation blacklist add field1 field2 field3
    In order to remove a field from the blacklist, execute:
    qfilter config mssqlcollation blacklist del field
  • noasterisk
  • This is a pretty dump filter. Sometimes, the target server filters queries that contain an asterisk. This filter replaces the asterisk character with a "1" character. This is very unusual, but once in a whil, it can be useful. To enable this filter, execute:
    qfilter add noasterisk
  • parenthesis
  • Sometimes, the target server filters the queries in such a way that whenever it finds a space character and some SQL keywords like 'and' or '=' around it, it drops the query. This can sometimes be bypassed by using parenthesis around spaces. When enabling this filter, queries like "...and 1=0 union all select 1,username from users" will be converted to "...and(1)=(0)union all select 1,username from users". To enable this filter, execute:
    qfilter add parenthesis
  • regex
  • This filter recieves a regular expression and a replacement as arguments and executes the regular expression, and replaces the matched text with the replacement given. This can be used to bypass some specific filters, which may not be as common as others. To enable this filter, execute:
    qfilter add regex REGULAR_EXPRESSION REPLACEMENT
    Note that you might want to use quotes around the regular expression or the replacement if they contain spaces:
    qfilter add regex 'union all' union
    This will replace the string "union all" with the word "union".
  • space2comment
  • This filter can be used when an IPS rule detecs strings like "union all select" ignoring their case. In this case, the "case" filter will not work, since "UnION AlL selECt" will be also detected. The space2comment filter replaces spaces with the string "/**/". This will be useful only under certain dbms, like Mysql and SQL Server. This filter will convert queries like "... and 1=0 union all select username,1 from users" to "... and/**/1=0/**/union/**/all/**/select/**/username,1/**/from/**/users". To enable this filter, execute:
    qfilter add space2comment
  • space2newline
  • This filter serves the same purpose as space2comment. space2newline converts queries like "... and 1=0 union all select username,1 from users" to "... and\n1=0\nunion\nall\nselect\nusername,1\nfrom\nusers" where "\n" is the newline character(note that this will be urlencoded to "%0a". To enable this filter, execute:
    qfilter add space2newline
Request filters
These are applied to the whole request(including URL, headers, method, etc), before sending it. So far there is only one request filter, the "uri_changer" filter. You can read about it in the article "How to write a mole request filter", which explains how to create a filter, and as an example, creates and explains the uri_changer filter.
Response filters
These are applied to the response provided by the server. Sometimes The Mole requires that the html returned by the server contains certain properties, like being pseudo-well-formed, that is, that for example the html or body tags are not closed in the middle of the html. In this case, if the needle is located after the html or body tags are closed, The Mole will fail to exploit the SQL Injection. Therefore, response filters try to sanitize the html so that it fits The Mole's requirements.
There are several response filters:
  • html_pretifier
  • This filter does exacly what was mentioned above, removes the "", "", "" and "" tags in order to fix those malformed html files. In order to enable it, execute:
    responsefilter add html_pretifier
  • regex_rem
  • This filter removes the next matched by a given regular expression. This might be usefull if the html is highly malformed(note that The Mole supports injections that return malformed html, but sometimes, they're just way too malformed. In order to enable it, execute:
    responsefilter add regex_rem REGULAR_EXPRESSION
    Remember that you can quote the regular expression if it contains spaces.
  • regex_rep
  • This filter serves the same purpose as the "regex_rem", but receives a string that will be used as a replacement for the matched strings. In order to enable it, execute:
    responsefilter add regex_rem REGULAR_EXPRESSION REPLACEMENT
  • script_error_filter
  • This filter is enabled by default. Sometimes when the target server's scripts are configured in such a way that when they have errors, an error message is echoed(for example, the "Warning: blabla on line 222" warning echoed by PHP). These strings make The Mole miss some injections. Therefore, this filter removes those error strings(at least some of them, we will be adding more as we step with them. So far only PHP errors are filtered).
Note that to remove a filter, execute the corresponding command(qfilter, responsefilter or request filter), using the "del" argument and the name of the filter to remove. For example:
qfilter del between

Serial Number / ID Tinta Epson L100, L200, L800


Kali ini saya akan sharing tentang Serial Number / ID Tinta Epson L100, L200, L800. langsung saja ya...

Disini saya akan mencoba berbagi Serial Number / ID Tinta Epson L100, L200, L800. >>

Serial Number / ID Tinta Epson L100, L200 (4 Botol Tinta)


Black ID Tinta :
9BK-VCG-9TB-V29R
Y6J-ND6-7P5-PUPM
8YF-WYY-BN3-7895
Z83-XZZ-DZ9-AP2R
4AA-YKA-JWP-YG8Q
PX3-C4Z-UB8-TT9Q
EKA-3TF-A24-GETR
J3K-958-9J4-5DLN
GDU-T62-G5N-3GMJ
7UR-BVW-47F-MBLZ
GPC-XJQ-VT9-799R
6T2-YBZ-9WX-J42A
3BV-YV9-459-S2RC
2YB-CXS-T8D-KXDG
445 - 645 - 6UD - E7VQ
X52 - 4HD - UVR - ZYRC
YVJ - FAW - J92 - QUES
VYM - 8WZ - 5F2 - RMQ3
B3M - QUH - 5ZB - YE8Z
TW7 - 6UE - BN4 - L8MB
63C - 8CD - DDQ - 55DA
A6X - 4HV - DQ9 - X3BZ
38J - 7W3 - 7WF - AL2B
H7R - HJK - FFU - P6EM
VB5 - 3TW - TVE - 9PAP

Magenta ID Tinta :
PBX-M6D-6CS-X44Q
9LN-33L-CMF-ZQR3
47S-2KX-JTW-8PDA
BMC-KU8-2LT-C3VM
LW6-5YU-QNU-RU35
LV5-BJ8-W26-GSJS
SYH-LYR-7RR-L8EF
MWA-MUJ-W6K-YJDY
HXB-ES6-5TD-UKRP
BJ2-HB4-8QP-GKPQ
4XP-YJ7-N7Z-6X63
VKT - 3N8 - K3S - EDQR
LDR - 2EA - 6KL - 4KCP
K5X - AW3 - VDU - X8GN
FEA - 8Q8 - UZM - B7U5
FXL - LFM - XAY - LUR3
9A2 - E8J - BH9 - 8D6Z
F7B - 339 -ED2 - J4UA
X4H - PNM - 2V5 - DGNZ
22L - AML - DVU - 9RK9
72W - J3K - 4BE - L7KG
EG2 - JSH - 6HY - KBX5

Yellow ID Tinta :
JR8-929-5EG-SVTJ
SEM-WBF-REX-CUHJ
5LN-834-UT6-7DUY
DRV-QET-8H5-FWTE
B7R-5E7NTJ-HRDM
RXU-7VR-XK7-P7JZ
FX2-6XP-PGL-LTFP
K33-RG2-YRN-XACJ
QGM-5Z8-6UC-UWBQ
B5W-AZ8-F82-QADY
G4A-9VQ-A8Q-2EFZ
DN4 - 5BE - S26 - NMY5
ALQ - W9G - 92W - YDMN
PPZ - FTN - 6TL - D8EZ
QDB - L3C - 5NU - TP5G
VPT - 36F - A3E - KW7E
QGD - P7Q - PLX - CNUZ
7XG - B4Q - QFZ - XCJG
HM9 - JVZ - LQ3 -H4BA
5G3 - VR3 - HPU - 6XDZ
77X - 5CP - 527 - H4JZ
ADE - BRE - Z8S - JR6J

Cyan ID Tinta :
P3L-AWY-7E4-78GM
 Z7B-XK6-G8L-3CN3
77C-ZNQ-DS7-SC5M
B5V-DDM-QTT-FDR3
PSC-A9Z-87X-6Z4R
XXX-996-B96-BBUC
DV9-E8U-JW4-K47Z
WQ3-8ZR-M6Z-Z96F
MAY-M8D-8LZ-VUXC
VKP-V8T-87L-PGWB
LHL-K58-D3H-GV25
vbm - L3q - 4wp - v2te
Y2A - VBR - QBZ - XD3Q
H2X - 4UX - 7X9 - 4KCP
B84 - RUA - MM7 - UY85
JSL - 5PU - 5HL - QQBF
CL4 - CQB - HUG - Y53P
A92 - Y6J - YTM - 55VZ
DY5 - 744 - DTS - CR4A
J44 - 5LP - 2QL - WCWP
B94 - MK2 - UXJ - 2BGE
4ND - YSC - M3G - VGNC

Serial Number / ID Tinta Epson L800 (6 Botol Tinta)


Black ink bottle ID:
QJK-8M3-8SK-WE7N
TQY-9DL-2WA-98EA
L5H-8YL-MGG-2CDJ
QTX-WHE-R6L-DTBM
TUP-AB9-KPS-MZX5
32X-FDB-UUT-26UC

Cyan ink bottle ID:
64S-GB8-D68-PEPB
A7R-VLM-LRA-X583
QWU-ZXZ-RVP-V7HZ
8LL-JEM-CD2-957F

Light Cyan ink bottle ID:
TJT-2EQ-F9H-T97C
327-6WX-BN3-CFHS
SFL-J2G-RH2-857M

Magenta ink bottle ID:
3BJ-VEF-RV7-J8AE
F68-2JE-E6T-BQ6N
RVR-9Z4-CA7-ZUDR
NQ8-TFS-Q34-J4RC

Light Magenta ink bottle ID:
XKK-3TP-UU4-XE85
Z5Z- C5Q-Q6F-APZF
9F8-QEC-RDD-85TF

Yellow ink bottle ID:
UTV-GPF-2H3-BFW5
C9K-88G-JUQ-HGYM
FB7-Q2N-APU-XQ4E
SF8-WBQ-LH7-S5TF

Bagi yg tidak ingin menggunakan Serial Number atau ID Tinta, bisa menggunakan alternatif software WIC Reset Utility. Silahkan Baca di sini http://imamul-khair.blogspot.com/2012/04/cara-reset-ink-level-epson-l100-l200.html

Cara Reset Ink Level Epson L100, L200, L800 tanpa SN ID Tinta


Anda Pengguna Epson L100, L200, atau L800 ? Trik kali ini patut anda coba. Pengalaman kali ini adalah tentang Cara Reset Ink Level Epson L100, L200, L800 tanpa SN ID Tinta. Mari langsung ke TKP.

Printer Epson Seri L100, L200, L800 adalah printer infus resmi dari vendor Epson. Jika Ink Level Epson L100, L200 atau L800 menunjukkan posisi kosong / empty, maka biasanya Anda harus memasukkan SN ID Tinta Epson yang tertera di botol Tinta Epson.

Trik Kali ini adalah tentang Cara Reset Ink Level Epson L100, L200, L800 tanpa SN ID Tinta. Jadi anda tidak perlu lagi memasukkan SN ID Tinta Epson ketika Ink Level L100, L200, L800 menunjukkan posisi kosong / empty.


Cara Reset Ink Level Epson L100, L200, L800 tanpa SN ID Tinta :
  • Download Program Reset Ink Level Epson L100, L200, L800  ===> DI SINI
  • Extract File Reset Ink Level Epson L100, L200, L800 dengan menggunakan 7 ZIP. Jika belum punya silahkan Download  ===> DI SINI.
  • Program reset Ink Level ini namanya WIC Reset Utility. Instal program tersebut di komputer anda. Caranya : double klik WIC(x32).exe => Next 4x => Install => Finish.
  • Setelah itu Jalankan WIC Reset Utility yang telah anda install. Jangan lupa Printer anda harus dalam keadaan ON dan terkoneksi dengan komputer.
  • Perlu di ingat : Program WIC Reset Utility hanya bisa mereset Ink Level Epson L100, L200, L800 yang sudah kosong yang ditandai dengan tanda "SERU". 
  • Setelah WIC Reset Utility di buka, pilih jenis printer epson anda. Kemudian Klik Reset Inks ==> Continue : klik YES ==> Klik Done. 


  • Setelah itu, Matikan Epson L100, L200, L800 anda. Dan kemudian hidupkan kembali, maka Ink Level Epson anda akan ter reset dan kembali FULL tanpa harus memasukkan kode SN ID Tinta Epson Original.
Selamat mencoba dan semoga berhasil.
# sumber:. http://ekohasan.blogspot.com/2011/11/cara-reset-ink-level-epson-l100-l200.html

Jumat, 13 April 2012

Norton Internet Security 2012 OEM 60 Days

Norton Internet Security 2012 provides our most powerful virus, online and PC protection so you can do more without interruption. Browse, shop, and bank online with powerful protection against getting attacked or ripped off. Norton Internet Security blocks dangerous websites, and detects and eliminates online threats so you can safely enjoy your favorite Internet activities.

Features of Norton Internet Security:
* Our fastest performance ever
* Industry-leading protection
* Easier to use Control Center and features
* Norton Protection System
* Customizable Control Center
* Identity Safe
* Bandwidth Management
* Download Insight 2.0
* Norton Recovery Tools
Norton Internet Security
DOWNLOAD

Linkman Pro 8.40.2.0 Full

Linkman Pro is a complete bookmark management solution to store, organize, annotate and check your favorite Internet pages. Linkman efficiently handles up to tens of thousands of URLs by using a database to store your links. It can call upon many powerful facilities that replace the browser’s native URL management systems.

You can easily add links from all browser windows and let retrieve keywords and descriptions automatically. The user interface is highly customizable. You get the capability to import and synchronize from existing bookmark collections and export bookmarks in a variety of formats.
You can even build your own Export Templates. Several Template examples like XML and HTML output are included. Linkman Pro supports multiple versions of ten different Windows browsers. The help file includes a comprehensive, screenshot based tutorial.
Linkman Pro

Features of Linkman Pro:

» Compatibility with all major Windows browsers (IE, Firefox, Opera, Chrome, Seamonkey, Maxthon, etc.)
» Use the same link collection across different browsers
» Supports keywords, ratings, comments, descriptions and user defined data
» Ability to handle large databases (even millions of links) without performance or stability issues
» Internet Explorer integration
» Firefox 3 integration
» Optional Desktop Toolbar for fastest browsing ever
» Optional Internet Explorer Toolbar
» Highly customizable user interface
» Detects duplicate links, even if they differ in subdomains, ports or login data
» Query for URLs on the same domain or subdomain and display results in groups
» User defined rating system
» Synchronization
» Extensive help file including Tutorial
» Retrieves keywords, descriptions from web pages
» Password protection
» Multiple import and export formats
» Fully customizable Html Link webpage generation
» Text and Status Query
» Printing support
» Sort feature with multiple sort orders and autosort
» Drop Basket for faster browsing and URL addition
» URL Path associated launch
» URL Launch History
» Fast Links for fast access to your favorite URLs
» Daily Links feature to launch several bookmarks with one click
» Full Drag and Drop support including link drops from browser to Linkman
» Advanced Tray Icon (configurable click actions)
» User defined browser support
» Auto save
» System-wide hotkeys for easy use, even when working with another application
Features of Pro-version:
» Optional installation on USB sticks for mobile usage
» Ability to check URLs for dead links, intelligent (only major) content changes, and page movements
» Search and Replace feature (Edit menu)
» Retrieve user configuable URL meta tags (Lite version retrieves only Keywords and Description)
» Editable Export Templates (XML, TSV…) with UTF8 support
» Query results can be exported using Templates
DOWNLOAD

Password Depot Professional 6.1.2 Full

Password Depot is a powerful and user-friendly password manager which helps to manage all your passwords. Password Depot protects your important and confidential passwords from external access while offering maximum user-friendliness! According to Computerbild 01/08 Password Depot was “the only password management software that made a good impression during the comprehensive security test.

Password Security:
• Best protection of your data due to double encryption with Rijndael 256! Your password list is protected twice: with the master password and with an internal key.
• Protection from keylogging (intercepting of keystrokes) – All password fields are internally protected from keylogging.
• Password Depot leaves no trace of your passwords in the RAM. So even an attempt by a hacker to use your computer and try to browse the cryptic memory dumps for passwords – a theoretical option – would be defeated.
• Clipboard protection – Password Depot automatically detects any active clipboard viewers and masks its changes to the keyboard; after performing auto-complete, all sensitive data is automatically cleared from the clipboard.
• The integrated password generator creates virtually uncrackable passwords: instead of passwords like “sweetheart” or “John”, which can both be cracked in a few minutes, you now use passwords like “g/:1bmV5T$x_sb}8T4@CN?A:y:Cwe-k)mUpHiJu:0md7p@
Password Management:
• Friendly and easy-to-use interface, similar to the Windows Explorer, that allows you to navigate the password lists.
• Top bar window for faster and more efficient navigation. Now available in classic design or as application desktop toolbar
• Auto-complete action that allows you to automatically complete fields on a web page with user name and password.
• Supports Firefox, Netscape, Opera and Microsoft Internet Explorer.
• Password lists on the internet: Place your encrypted password lists on the Internet and enjoy access to all of them, no matter where you are!
• Import/export of passwords from/to other password managers.
• You can open a password’s website directly from the program.
• Copy password, user name or URL to clipboard or drag & drop to the target field.
• Integrated server module: Share Password Depot with several users on a local network!
• Support of USB flash drives: Keep your passwords handy all the time by storing Password Depot and your passwords on a USB flash drive.
Password Depot

Additional Features of Password Depot:

• Custom fields: Create as many fields as you like in the database. That way you can adjust Password Depot to your personal needs.
• Recognition of correct passwords: The program recognizes automatically the password that is used for a website and suggests it automatically!
• New wizards: Add web passwords using the wizards. Or install Password Depot on a USB flash drive with the help of the wizards.
• Perfect local security: you can use the lock function to restrict other user’s access to your personal passwords.
• Quality inspection of your passwords: Check the quality and security of your passwords! New and intelligent algorithms check the passwords employed and alert you in case of “weak” passwords.
• Encrypt external files with Password Depot to make secret documents inacessible for unauthorized persons.
• Erase external files completely so that there are no traces left on your hard disk.
• Variables in URLs: Use variables in URLs to meet all the requirements and to automate special cases.
• Support of TANs: Support of TANs was added for customers who are using Password Depot for online banking.
• Password policies: You can define rules which all new or modified passwords have to fulfill (minimum length, types of characters contained, etc.).
• New program options: Thanks to the numerous new program options Password Depot is individually configurable.
DOWNLOAD

4Videosoft MKV Video Converter 5.0.8 Full

4Videosoft MKV Video Converter can convert MKV, MPG, WMV, MP4, AVI to video MP4, AVI, 3GP, FLV, MOV, VOB and HD videos etc. and extract audio files from MKV video to AAC, AC3, AIFF, AMR, AU, FLAC, MP3, M4A, MP2, OGG, WAV, WMA.

With a wide range of editing functions,this MKV to Video Converter can be the best assistant for you: split the long-time file into several clips, crop video frame, join several files into one file, add image or text watermark and capture your favorite pictures. More specific parameters-setting can make your converted video more colorful.
4Videosoft MKV Video Converter

Key Features of 4Videosoft MKV Video Converter:

  • Convert MKV video to other video and audio formats
    4Videosoft MKV Video Converter can convert MKV, MPG, WMV, MP4, AVI formats to any other video and audio formats for all the players.
  • Convert video to audio
    4Videosoft MKV Video Converter can also extract audio from video and convert them to audio formats.
  • Video Splitter
    4Videosoft MKV Video Converter allows you to get any clips from your video sources.
  • Video Cropper
    4Videosoft MKV Video Converter allows you to crop video and adjust the output aspect ratio to get the perfect playing effect.
  • Video Joiner
    Merge your selected video files into one file after conversion for you to enjoy successively.
DOWNLOAD

Techsmith Snagit 11.0.0 Build 207 + keys

Techsmith Snagit, the award-winning screen-capture software. Using SnagIt, you can select and capture anything on your screen, then easily add text, arrows, or effects, and save the capture to a file or share it immediately by e-mail or IM. Capture and share an article, image, or Web page directly from your screen. Or, capture and share any part of any application that runs on your PC. Automatically save in one of 23 file formats, or send to the printer, to your e-mail, or to the clipboard.

Use Techsmith Snagit built-in editors to modify, annotate, and enhance your images and the Catalog Browser to organize your files. Increase your productivity while quickly creating professional presentations and flawless documentation. With powerful new features that allow you to edit previously placed objects, capture embedded links and add interactivity to your captures,SnagIt 8 makes it easier than ever before to capture, edit, and share anything on your screen.
Techsmith Snagit

Features of Techsmith Snagit:

» Capture – if you can see it, you can snag it!
» Don’t waste time cropping your captures. Snag exactly what you need, with just a click.
» Profiles make it easy. SnagIt comes with eleven preset buttons that make screen capture a cinch! Capture a region of your screen, text from a window, the contents of a tall page that scrolls, all the images on a Web page, you get the idea.
» Custom suits you. Don’t feel limited by the eleven profiles—create your own combinations for nearly unlimited capture possibilites. What’s that? You want to set up a keystroke that captures a menu along with the mouse pointer…adds a drop shadow…and sends the image directly to your ***** dot com blog? Sure, no problem!
Edit – the right tools, right now!
» You don’t need a million confusing options, you need the right tools at the right time. Unlike expensive, complex image editing suites,SnagIt makes everyday screen capture tasks one-click easy.
» Say more with pictures+words. Use an arrow to direct attention. Add a text callout to explain clearly. Apply ready-made objects from the menus…and your picture is worth 1,000 more words!
» Look like a pro. Make your screenshot pop with a drop shadow. Give it perspective, spotlight an area, or add other nifty effects.
» Convey complex ideas simply. Combine multiple images, callouts, shapes, and clip art stamps into a rich and detailed information graphic.
» Have fun! Add a speech balloon to that photo of your cat.
Share – send captures where they need to go…instantly!
» Yes, you can save your captures in all the common—and a few uncommon—image formats. But with SnagIt’s free output accessories you can do so much more!
» Collaborate in a flash. Click a button to send a screen capture by email, AIM, or Skype.
» Be social. Share screenshots on Flickr. Post images directly to your blog. Publish to your Web site via FTP. No technical degree required!
» Get projects done quicker. Embed images directly into your Microsoft Office projects, MindManager map, or OneNote page.
DOWNLOAD

Webcam Motion Detector 1.5 With Reg Key

Webcam Motion Detector is Motion detection and webcam monitoring. Video surveillance with multiple IP cameras and video capture devices. For each video frame, if motion is detected, the Alarm event occurs, that returns a global motion ratio, depending of the number of cells in which motion has been detected, and the level of motion in each cell.

A sensitivity grid is applied on video frames. You can adjust the sensitivity of the detection, and mask out areas of the camera view to avoid false alarms. When the camera captures video frames in a dark environment, it is possible that the electrical background noise of the CCD video cell creates fake motion detection events. It is possible to reduce the sensitivity of to the video noise by enabling the Reduce Video Noise option.
webcam motion detector
When an alarm condition is detected, the program can sound an audible alarm, or send you an email with a photo. Automatically capture photos, or record video in compressed files. Webcam Motion Detector includes an advanced player that allows to play video clips, capture video frames and perform frame overlay. Each camera has its own individual monitoring and recording settings. All settings, such as alerts, photos, and video recordings can be turned on and off using the built-in scheduler.
DOWNLOAD

SlimWare Utilities DriverUpdate 2.2.16918.26185 Full Version

SlimWare Utilities DriverUpdate is a professional application designed to find drivers updates for your system. DriverUpdate uses the latest technology to move the process of maintaining drivers from the local PC to the cloud. Cloud computing has revolutionized the way information is shared and communicated.

SlimWare Utilities DriverUpdate utilizes the cloud to provide a continuous stream of data to every version of the application. This provides users with up-to-the-minute evaluations of available drivers and, even better, it keeps users up to speed with the latest updates available from all their favorite manufacturers. Trying to manually keep track of every driver release, every system upgrade, and every Windows update can take time and energy.
Updating System Drivers makes your computer run better. It prevents device errors and can even lend quicker repairs to future problems. SlimWare Utilities DriverUpdate allow you to remove and update obsolete driver versions to prevent conflicts and maximize computer stability.
SlimWare Utilities DriverUpdate
Optimizing your PC
Having a slimmed down update process makes it easier to get the latest drivers, including those that improve computer performance, PC function and user accessibility
Better Controls
With SlimDrivers and DriverUpdate, you can take control of the various drivers on your PC. Quick setup lets you find outdated drivers, update old drivers and restore broken drivers just by pointing and clicking.
Rapid repair of Driver-related Errors
SlimDrivers and DriverUpdate are equipped to automatically repair problems with the update and install processes, taking the hassle out of unforeseen errors and incompatibilities.
DriverUpdate does the hard work for you
Other programs just tell you if a driver is outdated. DriverUpdate not only scans and flags updates, It lets you
start download and install processes automatically!
New Technology to Maximize Efficiency
Not all scans are created equal.  SlimDrivers and DriverUpdate implement the latest developments in analysis
technology, coordinating checks with the Windows Device Manager, Windows System Manager and Windows Update Online. 
DOWNLOAD

Beberapa cara Mengatasi “USB Device Not Recognized”

Mungkin sebagian kita pernah mengalami masalah ketika USB flash drive atau media berbasis USB tiba-tiba tidak terdeteksi oleh Windows, dengan muncul pesan “USB Device Not Recognized” atau pesan lainnya. Hal itu bisa disebabkan oleh berbagai hal, berikut beberapa cara yang bisa dicoba untuk memperbaiki masalah tersebut.

Untuk memastikan bahwa bukan USB drive kita yang bermasalah (rusak), sebaiknya dicoba memasang di komputer atau laptop lain jika ada. Jika di komputer lain USB masih terdeteksi dengan normal, berarti komputer (windows) kita yang bermasalah dan beberapa cara berikut bisa dicoba untuk mengatasinya.

Restart Komputer

Cara paling awal yang bisa dilakukan, mungkin hal ini bisa memacahkan masalah tersebut.

Melepas kabel power supply (battery untuk laptop)

Mungkin cara ini memang tidak populer (bisa dikatakan ‘aneh’), tetapi ketika membaca berbagai tanggapan akan permasalahan ini di situs Microsoft, ternyata menggunakan cara ini banyak yang berhasil. Caranya dengan mematikan komputer kemudian melepas kabel power supply (listrik) yang terpasang ke Komputer, kemudian tunggu satu atau beberapa menit dan pasang kembali kabel power tersebut.
Untuk laptop, melepas kabel saja belum cukup, tetapi juga harus melepas battery laptop dan tunggu beberapa menit kemudian pasang kembali. Jika langkah ini berhasil, kemungkinan yang bermasalah di chipset Motherboard komputer tersebut. Dengan melepas power supply, maka motherboard akan melakukan inisialisasi ulang sistem didalamnya.

Gunakan System Restore

Jika System Restore di komputer aktif, kita bisa mengembalikan setting dan konfigurasi sistem komputer ke waktu atau keadaan sebelum USB tidak terdeteksi. Perlu di ingat bahwa dengan sistem restore, maka program atau aplikasi yang ada setelah waktu/tanggal Restore akan hilang (tergantung setting drive mana yang di monitor).
System Restore bisa diakses melalui menu Start > Programs > Accessories > System Tools > System Restore.

Uninstall USB Host Controller melalui Device Manager

Langkah ini juga dilaporkan banyak yang berhasil mengatasi masalah USB Device Not Recognized. Langkah detailnya sebagai berikut :
  1. Buka COntrol Panel dan pilih Device Manager. Atau klik kanan My Computer dan pilih Properties, kemudian pilih menu Device Manager. Cara lain ketikkan Devmgmt.msc di meu Run dan klik OK, selanjutnya dari window yang muncul pilih Device Manager
  2. Pilih “Universal Serial Bus Controllers” ( biasanya terletak di bagian paling bawah), dan klik dua kali untuk melihat tampilan seperti berikut:
  3. Klik kanan dari daftar yang ada kata-kata “Host Controller” kemudian pilih Uninstall. Lakukan satu persatu, ingat yang ada kata “Host Controller” saja, kecuali ada masalah dengan port USB lainnya (sesuai dengan di daftar yang ada)
  4. Setelah selesai Restart, maka Windows akan otomatis melakukan installasi ulang driver USB di komputer
Jika setelah restart windows tidak melakukan installasi ulang driver USB, buka kembali Device Manager, dan klik kanan “Universal Serial Bus COntrollers” kemudian klik menu “Scan for hardware changes”. Biasanya langkah diatas bisa mengatasi masalah USB tidak terdeteksi.

Gunakan Microsoft FixIt

Mungkin ini cara yang di rekomendasikan, yaitu dengan menggunakan Tools dari Microsoft yang didesain khusus untuk mengatasi masalah USB yang tidak terdeteksi. Kunjungi halaman Diagnose and fix Windows USB problems automatically, selanjutnya klik tombol Run Now, maka ada di download tools kecil FixIt. Setelah selesai jalankan file tersebut (memerlukan koneksi internet untuk menggunakan program ini, karena akan mengunduh file yang lebih besar dari Microsoft).

Alternatifnya download versi Offline yang sudah saya downloadkan dan saya upload ke DropBox berikut FixIt Windows Xp,Vista,7 (26 MB) atau FixIt Windows 7 ( 10 MB). Buka folder FixIt Portable dan jalankan file Launch Fix it.exe.
Mungkin masih ada (banyak) berbagai cara lain yang bisa dicoba, termasuk menggunakan software pihak ketiga. Jika anda mempunyai cara atau alternatif lain, silahkan berbagi melalui komentar.

Cara Penggunaan Toolkit Penyedot Catridge Canon dan HP


Berikut ini kang Eko akan memberikan sedikit tentang Cara Penggunaan Toolkit Penyedot Catridge Canon dan HP. kang Eko sering mendapat pertanyaan ini, karena kebetulan kang Eko menjual peralatan service printer ini. Kunjungi http://ekohasan-store.blogspot.com
Ok mari langsung saja ya ...

Oya, sebelumnya, kang Eko ingin sedikit cerita, Toolkit Penyedot catrid Canon dan HP ini bisa kita gunakan untuk mengatasi :

  1. Catrid yang macet / buntu karena tinta kering.
  2. Catrid yang macet / tidak keluar karena kehabisan tinta dan telat refill.
  3. Dapat menarik udara dalam selang infus

Toolkit Penyedot Catridge Canon dan HP terdiri dari 2 bagian :

  1. Body toolkitnya
  2. Bantalan karet yang berwarna hijau


Cara Penggunaan Toolkit Penyedot Catridge Canon dan HP :

  • Pasang bantalan karet ke dalam Toolkit Penyedot Catridge Canon dan HP.
  • Bantalan karet ini ada beberapa macam, tidak masalah jika terbalik dalam pemakaiannya. Berikut ini saran pemakian bantalan karetnya
  • Setelah bantalan terpasang, pasang catrid yang akan di sedot, memang agak sedikit keras. 
  • Kemudian pasang spuit / suntikan tanpa jarum ke lubang bantalan karet bagian bawah.
  • Dan sedot catrid dengan suntikan tersebut.


Demikian Cara Penggunaan Toolkit Penyedot Catridge Canon dan HP.
Semoga bermanfaat dan selamat mencoba.

sumber: http://ekohasan.blogspot.com

Cara Mengatasi Udara Dalam Selang Infus Canon


Sering sekali kita jumpai printer Canon Infus yang mengalami masalah udara yang terjebak di dalam selang infus. Tentu saja hal ini akan mengakibatkan tidak lancarnya aliran tinta dari tabung infus ke catridge. dan akibatnya hasil print menjadi tidak sempurna, misal hasil cetakan putus-putus, bergaris, ada warna yang tidak keluar, dan sebagainya.

Mengapa Udara bisa masuk dalam selang infus Canon ?
Udara dalam selang infus Canon di sebabkan oleh adanya celah antara lubang catrid dan karet infus tempat selang infus yang masuk ke dalam catridge. Atau lebih gampangnya, sambungan selang dan catrid "longgar".  Celah ini terjadi karena lubang catrid tidak sesuai dengan karet, karena pada saat melubangi catrid hanya dengan solder / mata bor yang tidak sesuai dengan diameter karet dan knee infus. Akibatnya, lama-kelamaan udara akan bisa masuk dalam selang infus.


Peralatan Untuk Mengatasi Udara Dalam Selang Infus Canon :

  1. Lem UHU
  2. Toolkit Penyedot Catrid Canon


Cara Mengatasi Udara Dalam Selang Infus Canon :

  1. Siapkan Lem UHU (jangan menggunakan Lem ALTECO, dapat merusak plastik)
  2. Ambil Catrid dan jangan lepas selang infusnya.
  3. Lem bagian pinggiran lubang catrid tempat selang masuk, usahakan jangan sampai udara bisa masuk.
  4. Biarkan Lem mengering dulu.
  5. Buka Tutup pernafasan tabung Infus
  6. Siapkan Toolkit Penyedot Catrid Canon, kemudian Pasang Catrid ke Toolkit tersebut.
  7. Pasang SPUIT / Suntikan tanpa jarum ke lubang karet di bagian bawah Toolkit Penyedot Catrid.
  8. Kemudian sedot tintanya sampai udara dalam selang hilang.
  9. Printer sudah Ready.


Saran agar tidak terjadi masalah Udara masuk dalam selang Infus :
Gunakan bor infus yang sesuai dengan diameter karet Infus tempat L selang infus. Bor ini memiliki ukuran diameter 3.6mm.


Terima kasih, selamat mencoba, dan semoga berhasil.

sumber:  http://ekohasan.blogspot.com